Jump to Recipe
There’s something satisfying about a dessert you can eat in one bite without making a mess or committing to a full portion.
These tiny chocolate mousse bites started as a party experiment. I needed something that looked composed but didn’t require a pastry degree. Chocolate cups from the store, homemade mousse, a piping bag – done.
The mousse itself is a simple ganache-based version, not far in spirit from a light whipped mousse that sets without gelatin. No raw eggs if you don’t want them, no gelatin, no special equipment. It sets firm enough to pipe cleanly but stays light on the tongue.
You can make them the night before, keep them cold, and pull them out when guests arrive. They hold their shape for hours in the fridge.
Why You’ll Love This Recipe
- One-bite portions – no plates or forks needed
- Mousse sets overnight with zero extra effort
- Only six pantry ingredients required
- Holds in the fridge for up to two days
Ingredient Notes
- dark chocolate (70%): Use a bar you’d eat on its own – chips work but bars melt more smoothly. Milk chocolate can replace it for a sweeter, less intense mousse.
- heavy cream (double cream): Must be at least 35% fat to whip properly. Don’t substitute half-and-half or the mousse won’t hold its shape.
- pre-made chocolate cups: Found in the baking aisle at most supermarkets. You can make your own using a chocolate mold, but store-bought saves 30 minutes and they’re sturdier.
- powdered sugar: Sifted helps it dissolve into the cream without any graininess. Adjust the amount to taste depending on how bitter your chocolate is.
- vanilla extract: Pure extract gives a cleaner flavor than imitation. A small pinch of espresso powder can replace it if you want to push the chocolate flavor forward.
- egg white (optional): Adding one stiff-beaten egg white folds into the mousse to make it lighter and more airy. Skip it if you’re serving to anyone avoiding raw eggs.
Tiny Chocolate Mousse Bites
Ingredients
Method
- Place the chopped dark chocolate in a medium heatproof bowl.
- Heat 60 ml of the heavy cream in the microwave in 20-second bursts until it just begins to steam - do not boil.
- Pour the hot cream over the chocolate and let it sit for 1 minute, then stir slowly from the center outward until the ganache is smooth and glossy.
- Stir in the vanilla extract and a pinch of sea salt. Set aside and let the ganache cool to room temperature, about 20-25 minutes.
- Pour the remaining 180 ml of cold heavy cream into a chilled mixing bowl. Add the sifted powdered sugar.
- Whip with a hand mixer on medium-high speed until firm peaks form, about 2-3 minutes. Do not overwhip or the mousse will turn grainy.
- Once the ganache is fully cooled, add one large spoonful of whipped cream to the ganache and stir briskly to loosen it.
- Fold the ganache into the remaining whipped cream in two additions using a rubber spatula, cutting down through the center and folding up. Stop when no streaks remain - the mousse should be smooth and airy.
- If using egg white, fold the stiff-beaten white in gently at this stage with three or four slow strokes.
- Transfer the mousse to a piping bag fitted with a 1M star tip.
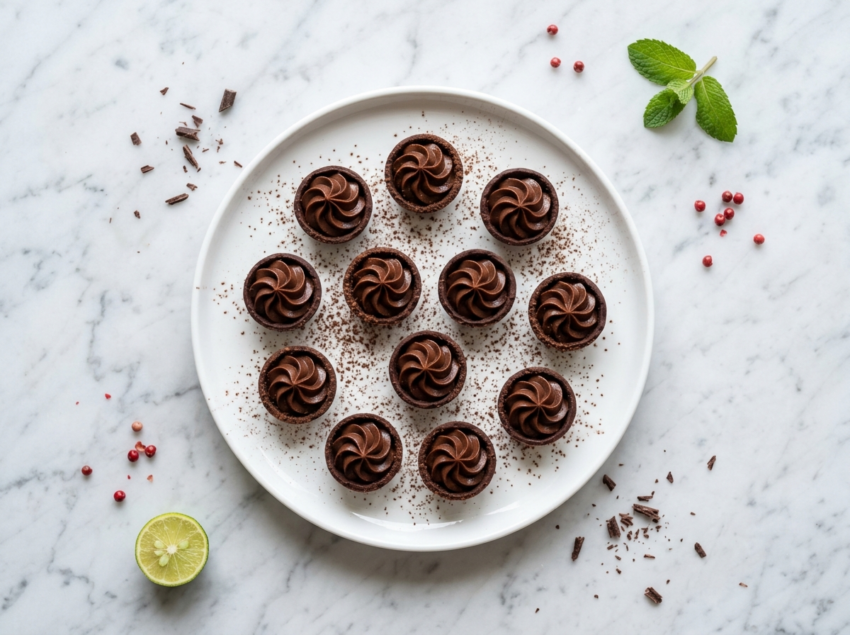
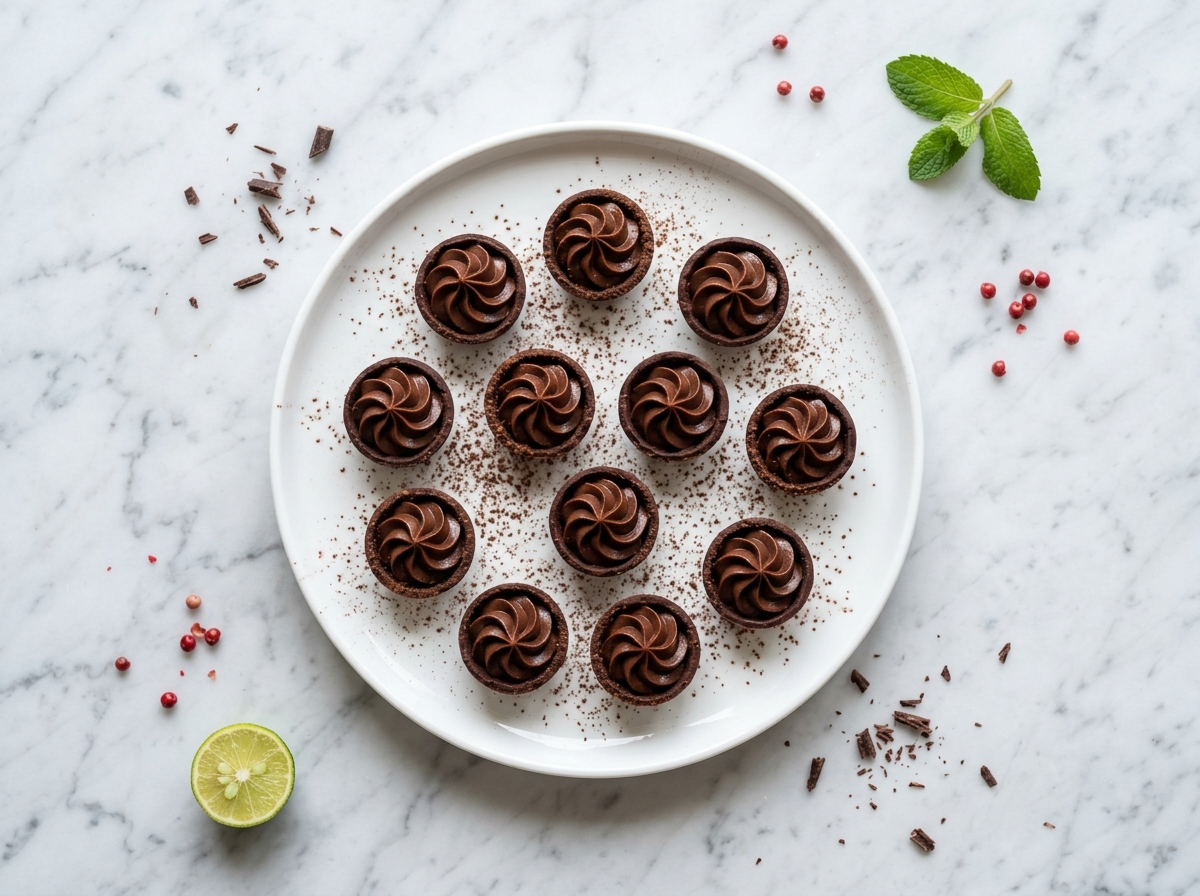
- Arrange the chocolate cups on a tray or board. Pipe a rosette of mousse into each cup starting from the outside edge and spiraling inward, finishing with a small peak in the center.
- Dust lightly with cocoa powder or scatter chocolate shavings over the top. Add a single flake of fleur de sel to each bite if using.
- Refrigerate uncovered for at least 2 hours until the mousse is set and firm to the touch. Serve cold or at cool room temperature.
Notes

Tips for Success
- Chill your mixing bowl in the freezer for 10 minutes before whipping the cream – it whips faster and holds peaks longer.
- Melt chocolate in 20-second microwave bursts, stirring between each, to avoid scorching the ganache base.
- Let the ganache cool to room temperature before folding into whipped cream, or the heat will deflate the whole batch.
- Use a star-tip piping bag for a clean rosette on each cup – it takes 30 seconds per tray and makes them look finished.
- Refrigerate the filled cups uncovered for the first hour so the mousse sets without condensation from plastic wrap flattening the tops.
Variations
- Fold in 1 tsp orange zest and a drop of Grand Marnier for a chocolate-orange version.
- Swap dark chocolate for white chocolate and add raspberry jam at the base of each cup before piping.
- Top each bite with a flake of fleur de sel and a tiny gold leaf for a plated dinner party presentation.
Storage and Reheating
Store filled chocolate cups in an airtight container in the fridge for up to 2 days. Place them in a single layer – stacking crushes the mousse.
Don’t freeze filled cups. The chocolate shells crack when they thaw and the mousse can weep. You can freeze the plain mousse on its own for up to 3 weeks in a sealed container, then thaw overnight in the fridge and re-whip briefly before piping.
Bring the bites out of the fridge about 10 minutes before serving. The mousse flavor opens up slightly at cool room temperature compared to straight from the cold.
Serving Suggestions
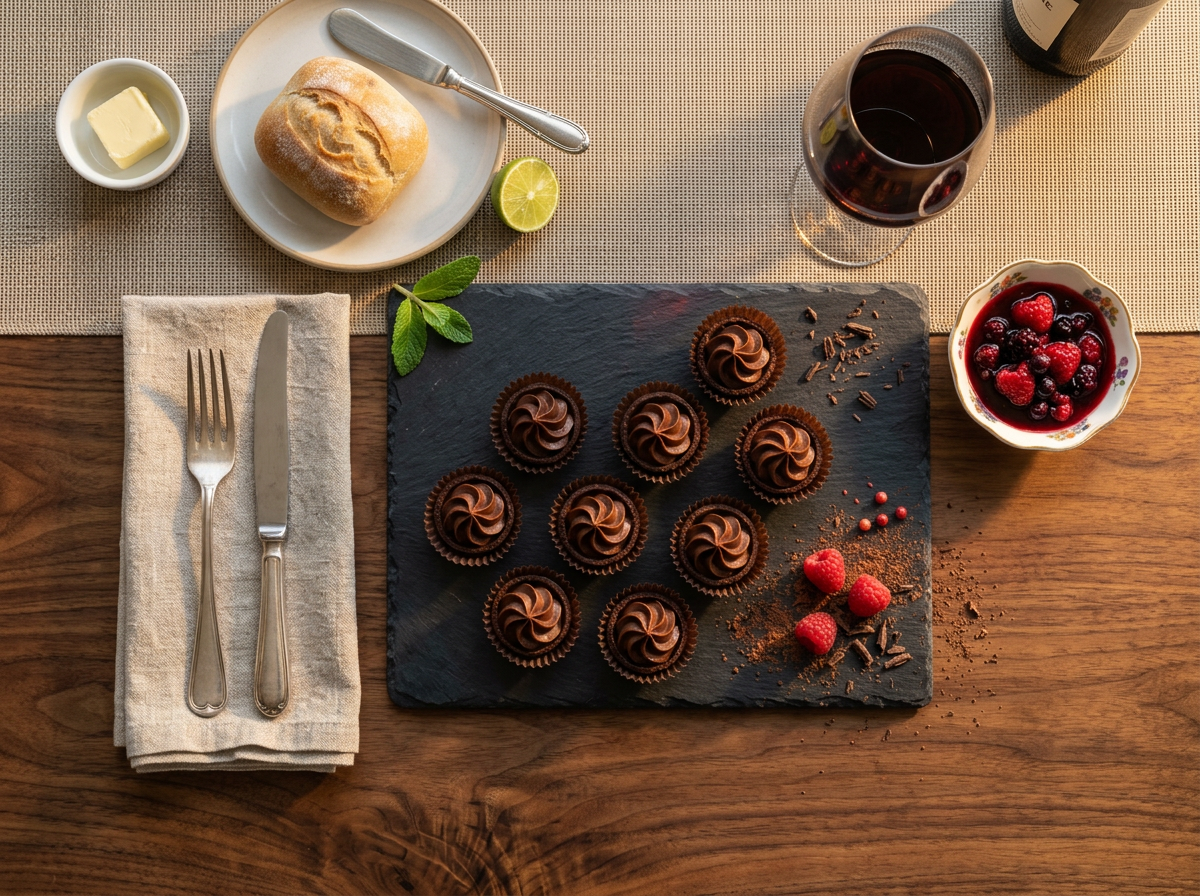
Arrange them on a slate board or a white ceramic platter with a few fresh raspberries and some shaved chocolate scattered around. The contrast of textures makes the tray look intentional without any extra effort.
They pair well after a dinner party main – light enough that guests will reach for two or three without feeling heavy, much like a silky no-bake panna cotta would at the end of a meal. Serve alongside a small glass of port, an espresso, or a dessert wine like Banyuls.
For a more casual setup, set them out in paper candy cups on a tiered tray at a birthday or bridal shower, or alongside no-bake chocolate party bites for a fuller spread. The individual portions mean no serving utensils and no mess.
FAQ
Why is my chocolate mousse too dense to pipe into the cups?
The ganache base was probably still warm when you folded it into the whipped cream, which deflated the air. Let the melted chocolate mixture cool fully to room temperature before combining. If it’s already mixed and dense, gently fold in another 2-3 tbsp of freshly whipped cream to lighten it.
Can I use milk chocolate instead of dark chocolate for the mousse filling?
Yes, milk chocolate works and gives a sweeter, creamier result. Reduce the powdered sugar to 1 tsp or skip it entirely since milk chocolate is already quite sweet. The mousse will also be slightly softer, so chill it for an extra 30 minutes before piping.
Can I make the mousse filling two days ahead and store it separately?
You can make it one day ahead and keep it covered in the fridge. Give it a brief stir or a quick fold with a spatula before piping – it stiffens overnight but loosens up easily. Don’t pipe more than a few hours before serving or the mousse surface can dry out.
What’s the difference between these chocolate mousse bites and a standard chocolate truffle?
Truffles are ganache-based and dense all the way through. These mousse bites have an airy whipped filling inside a thin chocolate shell, so the texture is much lighter. The shell also gives you a snap that a truffle doesn’t have.
Are these tiny chocolate mousse bites gluten-free?
The mousse filling itself contains no gluten. The store-bought chocolate cups are often gluten-free too, but always check the label since some brands are made on shared equipment. If you’re serving someone with celiac, look for cups with a certified gluten-free mark.
How many mousse bites should I plan per person for a party?
For a dessert table with other options, 3-4 bites per person is a good baseline. If these are the only dessert, plan for 5-6 per person. They go fast, so it’s worth making a double batch.