Jump to Recipe
There’s something about a warm, caramel-filled pastry that makes any afternoon feel like a occasion worth sitting down for.
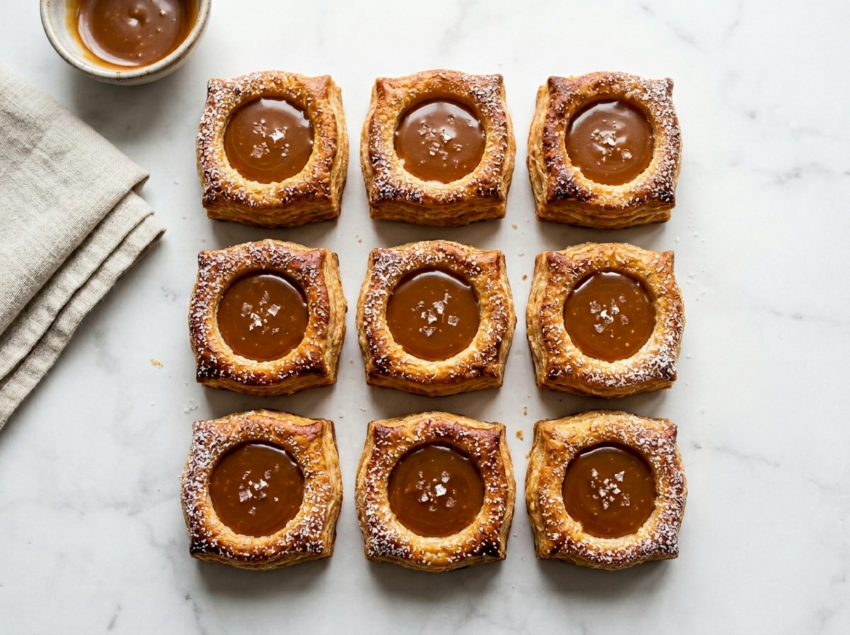
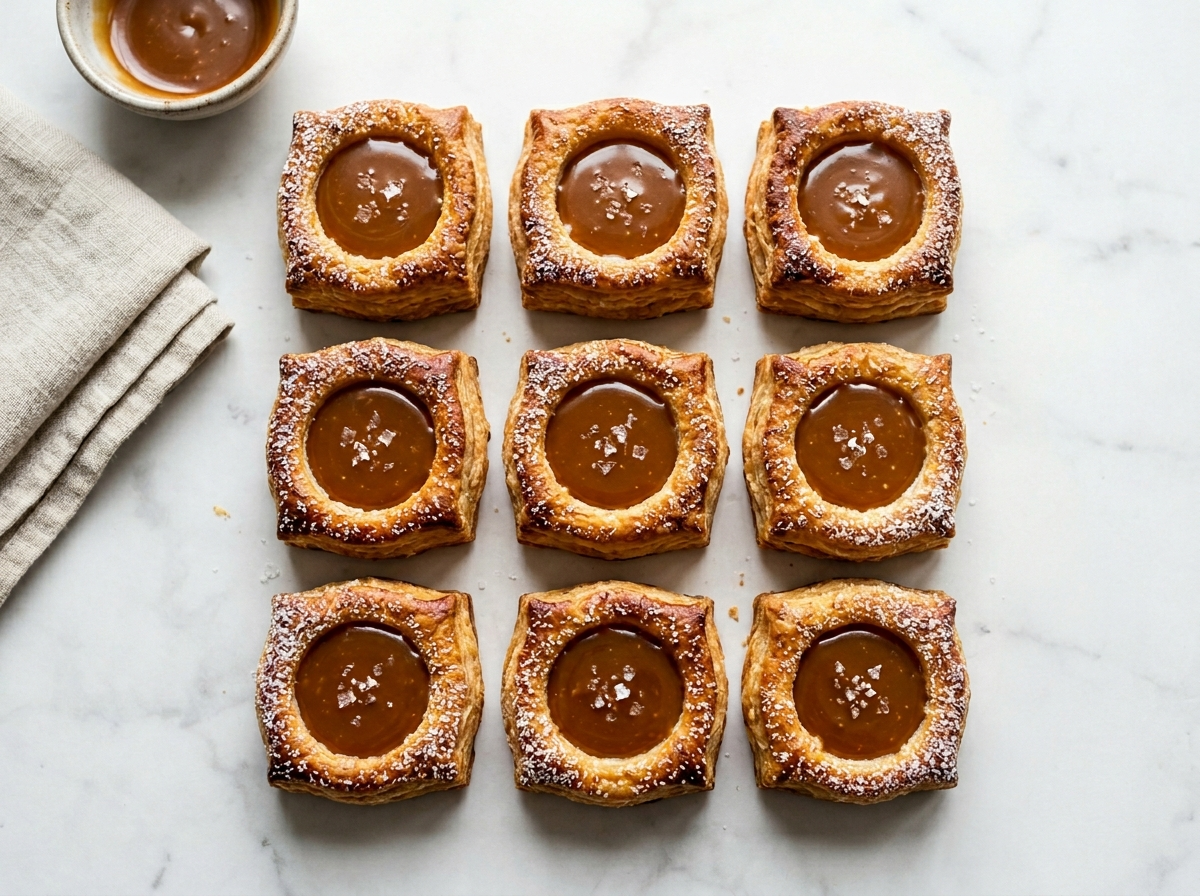
These mini caramel puff pastries are the kind of thing I make when I want to impress without spending hours in the kitchen. Store-bought puff pastry does the heavy lifting. A simple caramel made from sugar, butter, and cream does the rest.
The pastry bakes up golden and hollow in the center, which is exactly the pocket you need for the caramel. It pools slightly, gets a little sticky at the edges, and that’s when you know they’re right.
They work on a dessert board, a coffee table, or just eaten standing at the kitchen counter. Whichever you choose, make a double batch.
Why You’ll Love This Recipe
- Ready in 40 minutes with store-bought puff pastry
- Caramel made from just 3 pantry ingredients
- Perfectly portioned for parties or sharing platters
- Pastry shells can be baked a day ahead
Ingredient Notes
- puff pastry: Use all-butter puff pastry for the best flavor and flakiest layers. Thaw it in the fridge overnight – never at room temperature or it gets soggy and hard to cut.
- granulated sugar: Standard white granulated sugar works best for a clean, golden caramel. Brown sugar will give a deeper molasses flavor but can make the caramel slightly grainy.
- unsalted butter: Use cold unsalted butter cut into cubes so you can control the salt level. Salted butter works in a pinch – just skip the pinch of salt in the caramel.
- heavy cream: Full-fat heavy cream (35% fat or higher) is needed to keep the caramel smooth and pourable. Half-and-half can cause the caramel to seize or turn grainy.
- egg (for egg wash): One beaten egg brushed on the pastry edges gives the deep golden color you want. Whole milk brushed on will work but the color will be paler.
- flaky sea salt: Optional but worth it. A few flakes on each filled pastry right before serving cuts through the sweetness and makes the caramel taste more complex.
Mini Caramel Puff Pastries
Ingredients
Method
- Heat the oven to 200 C / 390 F. Line a sheet pan with parchment paper.
- Unroll the puff pastry on a lightly floured surface and cut it into 18 equal squares, roughly 6 x 6 cm each.
- Score a smaller square about 1 cm inside the edge of each piece using a sharp knife - press firmly but do not cut all the way through.
- Dock the inner square of each piece 3 to 4 times with a fork to prevent it from rising.
- Place the squares on the prepared sheet pan. Brush the scored border of each square lightly with beaten egg, avoiding the inner square.
- Bake for 18 to 22 minutes until the borders are deep golden brown and the inner square is cooked through but flat. Transfer to a wire rack and cool for 10 minutes.
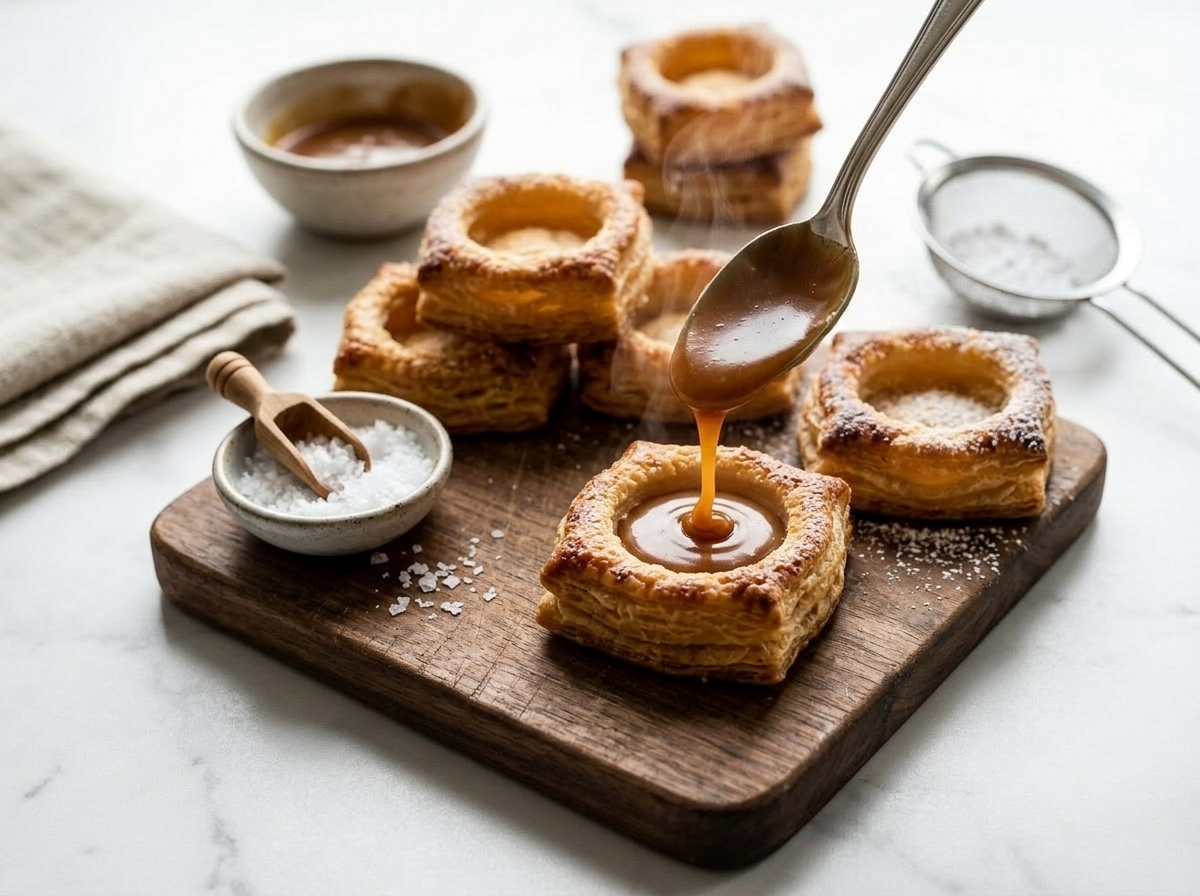
- If the inner squares have puffed up, press them down gently with the back of a teaspoon to create a well for the caramel.
- Pour the granulated sugar into a heavy-bottomed saucepan over medium heat. Stir constantly with a wooden spoon until the sugar fully melts and turns a clear amber color, about 6 to 8 minutes.
- Once fully melted and amber, stop stirring. Add the cold butter cubes all at once and whisk vigorously until fully melted and combined, about 1 minute.
- Remove the pan from the heat. Slowly pour in the heavy cream while whisking - the mixture will bubble up sharply, so keep whisking until smooth.
- Add the fine sea salt and whisk once more. Let the caramel cool for 4 to 5 minutes until it thickens slightly but is still pourable.
- Spoon about 1 teaspoon of warm caramel sauce into the well of each pastry shell.
- Scatter a pinch of flaky sea salt over each filled pastry, if using.
- Dust the edges lightly with powdered sugar just before serving. Serve warm or at room temperature.
Notes
Tips for Success
- Score a smaller inner square on each pastry piece so the border puffs up around a defined well for the caramel.
- Dock the inner square with a fork before baking to prevent it from puffing too high and closing off the filling space.
- Stir the sugar constantly over medium heat until it melts, then stop stirring once it turns amber to avoid crystallization.
- Add the cream off the heat and whisk fast – the caramel will bubble aggressively, so use a pot at least twice the volume you need, the same principle that applies when making the honey caramel for brittle bars.
- Fill pastry shells while the caramel is still warm and slightly runny so it settles into the shell rather than sitting on top.
Variations
- Salted pretzel caramel: press a small salted pretzel into each filled shell for crunch and contrast.
- Apple caramel: add a small cube of sauteed cinnamon apple to each shell before spooning in the caramel.
- Chocolate drizzle: let the filled pastries cool, then drizzle with melted dark chocolate before serving.
Storage and Reheating
Baked unfilled pastry shells keep in an airtight container at room temperature for up to 2 days. Keep the caramel sauce in a sealed jar in the fridge for up to 1 week.
Fill the shells just before serving for the best texture. If you fill them more than an hour ahead, the caramel softens the base slightly – still good, just less crisp.
To reheat filled pastries, place them on a baking sheet in a 160 C / 320 F oven for 5 minutes. This crisps the pastry back up without burning the caramel.
Serving Suggestions
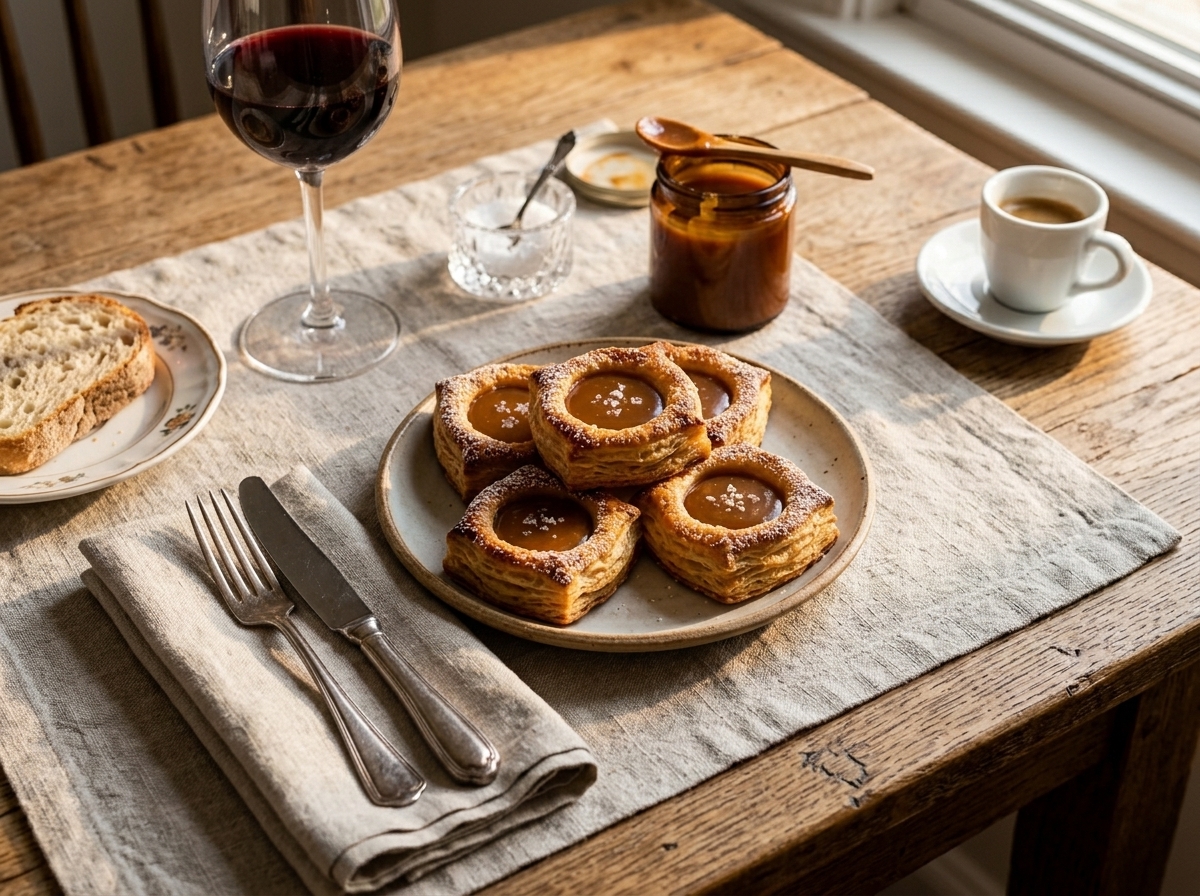
Arrange them on a flat board with a small dusting of powdered sugar and a few flakes of sea salt scattered over. They look good next to a small bowl of extra caramel sauce for dipping.
Serve alongside a strong espresso or a pot of black tea – the bitterness cuts the sweetness of the caramel cleanly. A glass of dessert wine like Sauternes also pairs well if you’re serving these after dinner.
For a dessert spread, put them next to fresh berries or sliced pears, or alongside a silky honey panna cotta. The fruit keeps the whole plate from feeling heavy.
FAQ
Why is my caramel for puff pastries grainy or crystallized?
Grainy caramel usually means the sugar was stirred after it started to melt and amber bubbles formed. Stop stirring once the sugar is fully liquid and just swirl the pan gently instead. Adding a teaspoon of corn syrup to the sugar at the start also helps prevent crystallization.
Can I use phyllo dough instead of puff pastry for these mini caramel pastries?
You can, but the result will be much crispier and more fragile rather than soft and layered. Brush each phyllo layer with melted butter and stack 4 layers before cutting and pressing into a mini muffin tin to form cups.
How do I know when the puff pastry shells are fully baked and ready to fill?
The shells should be deep golden brown on top and the underside should sound hollow when tapped. Pale or lightly golden pastry will go soft quickly once the caramel is added.
Can I freeze mini caramel puff pastries after filling?
Freezing filled pastries is not recommended because the caramel changes texture and can make the pastry soggy when thawed. Freeze the unfilled baked shells only, then thaw at room temperature and warm in the oven before filling with freshly made caramel.
What pairs well with mini caramel puff pastries on a dessert board?
Sliced fresh figs, toasted walnuts, and a wedge of aged brie all work well alongside these pastries. The salt in the cheese and the crunch of the nuts balance the caramel sweetness.
Are mini caramel puff pastries vegetarian?
Yes, this recipe is vegetarian as written. It contains dairy and eggs, so it’s not suitable for vegans without substitutions – use a plant-based puff pastry, coconut cream, and vegan butter for a dairy-free version.