Jump to Recipe
There’s something almost theatrical about watching sugar turn from golden to dark amber at the edge of the pan. One minute too long and it’s ruined. One minute short and you’ve missed the whole point.
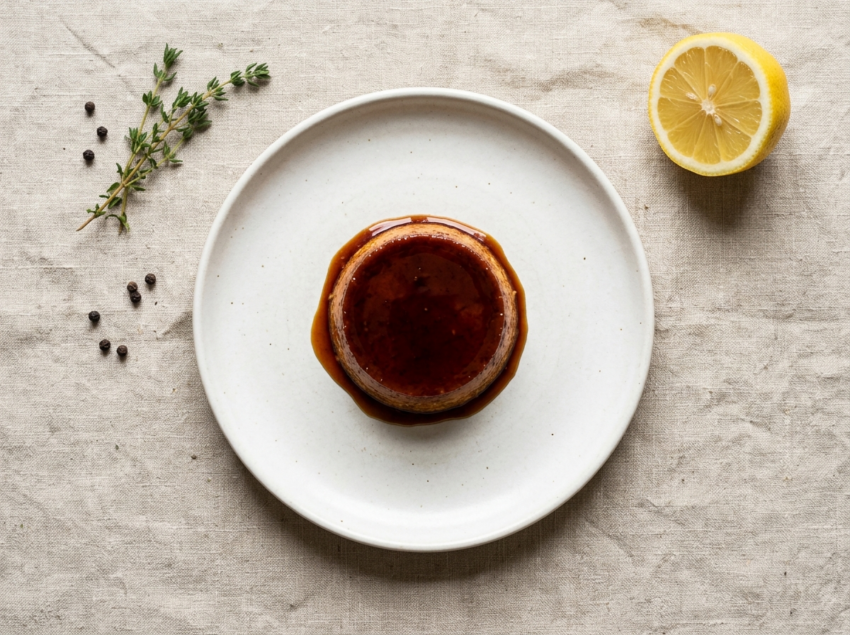
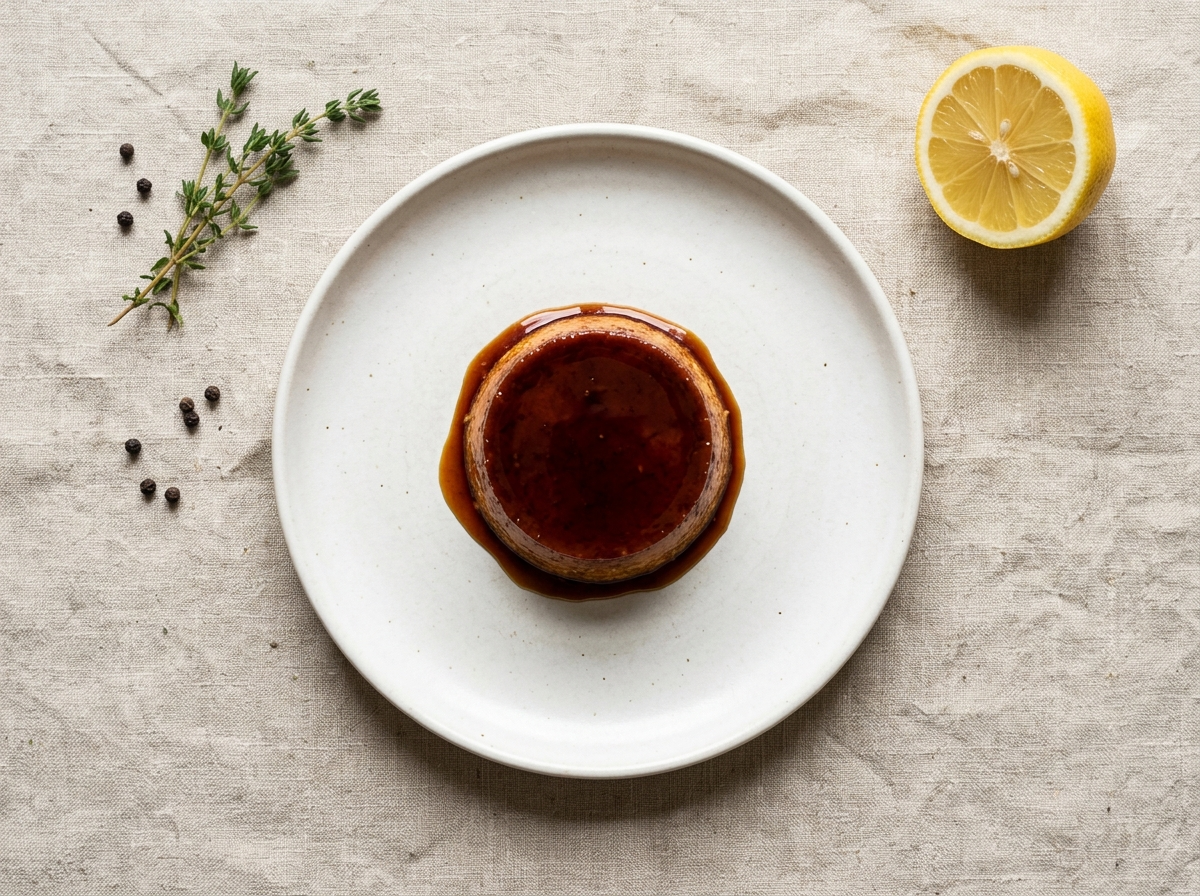
Burnt sugar custard sits right at that edge on purpose. The bitterness from the caramel cuts through the richness of the cream, and what you get is a custard that tastes layered and complex without being complicated.
I first made this after a trip to Brittany, where a similar baked cream appeared at a small restaurant in Quimper. No garnish, no drama. Just a cold ramekin and a spoon. It stuck with me.
This version is baked low and slow in a water bath, using the same gentle approach behind a firm silky baked custard, which keeps the texture smooth and prevents any rubbery edges. You’ll need patience more than skill.
Why You’ll Love This Recipe
- Deep caramel flavor that plain custard can’t replicate
- Smooth, jiggly texture from a slow water bath bake
- Make ahead and chill overnight for stress-free serving
- Only six ingredients, no specialist equipment needed
Ingredient Notes
- granulated white sugar: White sugar is best here because you can see the exact color change as it burns. Brown sugar adds molasses notes that compete with the caramel bitterness.
- heavy cream: Use full-fat heavy cream (35% fat minimum) for a custard that sets firmly enough to slice cleanly. Half-and-half will produce a softer, looser result.
- egg yolks: Six yolks give the custard its deep yellow color and rich set. Whole eggs work but produce a firmer, less silky texture.
- whole milk: Whole milk lightens the cream slightly so the custard isn’t too heavy. Do not use skimmed or reduced-fat milk here.
- vanilla extract: A small amount of vanilla rounds out the bitter caramel without masking it. A scraped vanilla pod works well too, especially if you have one on hand.
- fine sea salt: Salt sharpens the caramel flavor noticeably. Don’t skip it. A pinch goes into the custard base, not the caramel itself.
Burnt Sugar Custard Recipe
Ingredients
Method
- Heat oven to 150 C / 300 F. Place six 150 ml ramekins inside a deep roasting pan.
- Add 150 g sugar and 2 tbsp water to a heavy-bottomed saucepan over medium heat. Swirl the pan gently as the sugar dissolves but do not stir.
- Increase heat to medium-high and cook without stirring until the caramel turns a deep amber, almost mahogany color, about 8 to 10 minutes. Watch carefully from 6 minutes onward.
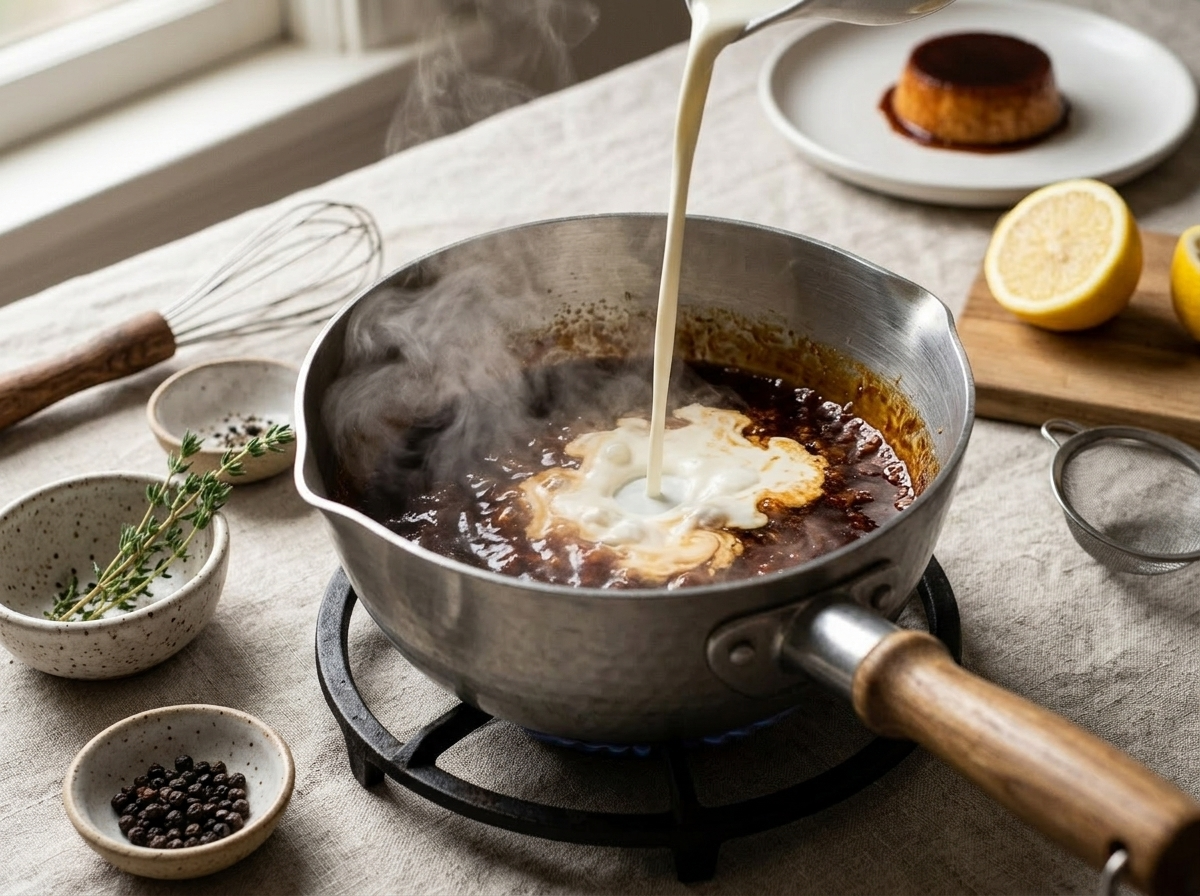
- Remove from heat immediately. Carefully pour in the 400 ml heavy cream in a slow, steady stream, it will bubble violently. Whisk until smooth. If the caramel seizes into lumps, return to low heat and stir until dissolved.
- Add the 150 ml whole milk and stir to combine. Set aside to cool for 5 minutes.
- In a large bowl, whisk together 6 egg yolks, 30 g sugar, 1 tsp vanilla extract, and a pinch of fine sea salt until the mixture is pale and slightly thickened, about 2 minutes.
- Slowly pour the warm caramel cream into the egg yolk mixture in a thin stream, whisking constantly to temper the eggs and prevent scrambling.
- Strain the entire mixture through a fine-mesh sieve into a large jug for easy pouring. Discard any solids.
- Divide the custard evenly among the six ramekins, filling each to about 1 cm from the top.
- Pour hot water into the roasting pan until it reaches halfway up the sides of the ramekins.
- Bake at 150 C / 300 F for 40 to 50 minutes until the edges are set and the center has a 2-inch wobble when the pan is gently shaken. An instant-read thermometer should read 77 C / 170 F at the center.
- Remove ramekins from the water bath and let cool to room temperature on a wire rack, about 30 minutes.
- Cover each ramekin with plastic wrap and refrigerate for at least 3 hours, or overnight, before serving.
Notes
Tips for Success
- Cook the sugar dry in a heavy-bottomed pan and swirl gently rather than stirring to prevent crystallization.
- Pull the caramel off the heat when it reaches a dark amber color, about 5 seconds before you think it’s done.
- Warm the cream before adding it to the caramel to prevent violent splattering and seizing.
- Strain the custard through a fine-mesh sieve before pouring into ramekins to catch any scrambled egg bits.
- Bake in a water bath where the water reaches halfway up the ramekins and check for a 2-inch jiggle at the center before removing.
Variations
- Burnt sugar and espresso custard: replace 60 ml milk with strong brewed espresso for a coffee-bitter edge.
- Salted caramel version: stir 1 tsp flaky sea salt into the warm caramel before adding cream.
- Burnt sugar custard tart: pour the strained mix into a pre-baked shortcrust shell and bake at 160 C for 25 minutes.
Storage and Reheating
Cover each ramekin with plastic wrap and refrigerate for up to 4 days. The custard firms up overnight and actually slices more cleanly on day two.
Do not freeze baked custard. Ice crystals break the emulsion and the texture turns grainy after thawing.
Serve cold straight from the fridge, or let ramekins sit at room temperature for 15 minutes if you prefer a slightly softer set.
Serving Suggestions
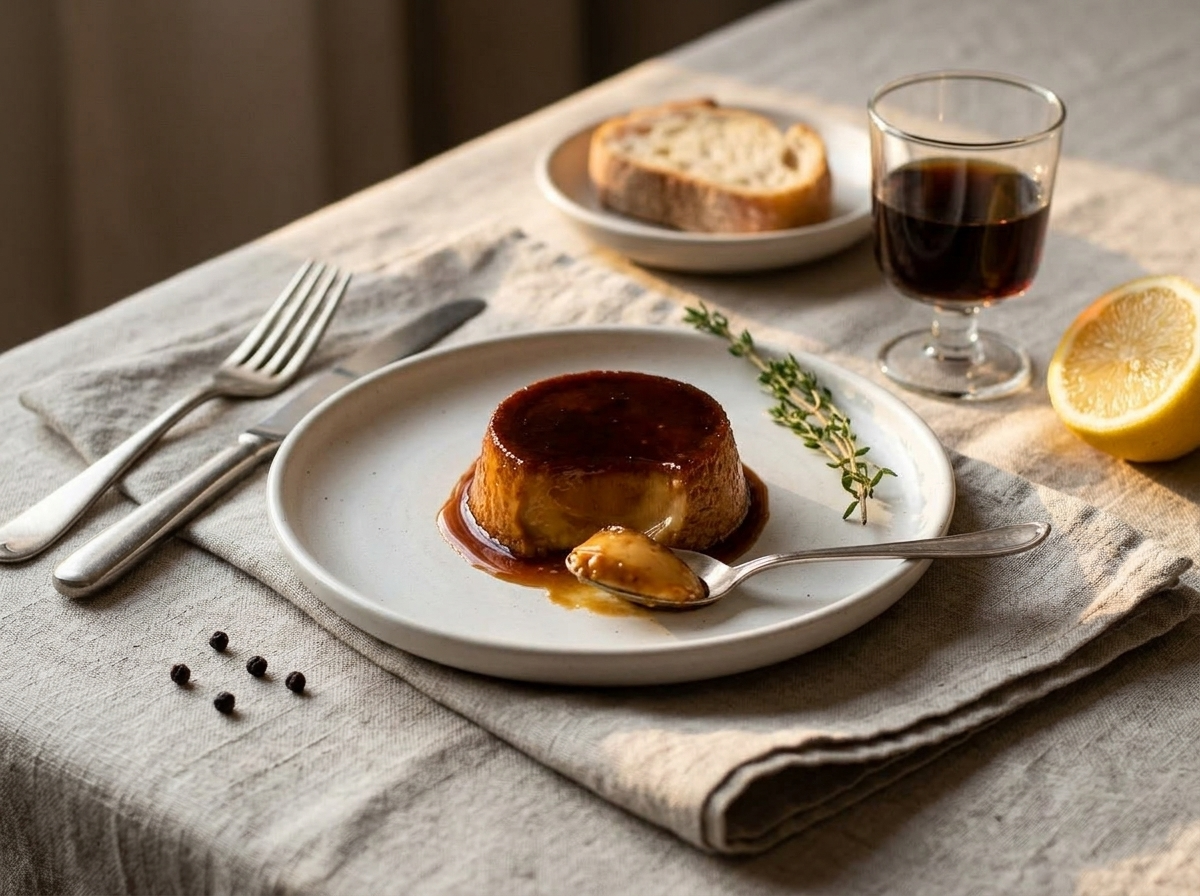
These custards need very little beside them. A small pile of lightly sweetened whipped cream on the side works well, but even that’s optional, much like how silky panna cotta desserts let the base flavor carry the dish.
For a sharper contrast, serve alongside a few slices of poached pear or a spoonful of tart cherry compote. The acidity cuts through the richness cleanly.
If you want to serve them as a more composed dessert, run a thin knife around the edge and invert onto a flat plate. The dark caramel layer on top makes a good impression at a dinner table.
FAQ
Why did my burnt sugar custard turn out grainy or curdled?
Grainy custard usually means the oven was too hot or the water bath ran dry. Bake at 150 C / 300 F maximum and check the water level halfway through. Straining the mix before baking also catches any pre-cooked egg bits that cause texture problems.
Can I use brown sugar instead of white sugar for the burnt caramel base?
You can, but white sugar gives you a cleaner, more readable color cue as it darkens. Brown sugar’s molasses content also means it burns faster and adds a different flavor profile that competes with the intended bitterness.
How do I know when the burnt sugar custard is done baking?
Give the pan a gentle shake. The outer inch should be set and the center should wobble like loose jello, not ripple like liquid. The residual heat finishes the center as it cools. An instant-read thermometer reading of 77 C / 170 F at the center also confirms it’s done.
Can I make burnt sugar custard a day before serving?
Yes, and it’s actually better after a night in the fridge. The caramel flavor deepens and the texture firms up to a cleaner slice or spoon. Cover tightly with plastic wrap so the surface doesn’t absorb any fridge odors.
What’s the difference between burnt sugar custard and creme brulee?
Creme brulee uses plain vanilla cream — closer in spirit to a silky vanilla custard base — with a thin sugar crust torched on top right before serving. Burnt sugar custard builds the caramel flavor into the base itself before baking, so the bitterness runs through the entire custard rather than just the top layer.
Is this burnt sugar custard recipe gluten-free?
Yes, there’s no flour or wheat-based ingredient in this recipe. Just double-check your vanilla extract label if gluten sensitivity is serious, as some brands use a grain-based alcohol carrier.