
Jump to Recipe
There’s something almost meditative about making caramel from scratch. You watch the sugar dissolve, smell the honey bloom, and pull the pot at exactly the right second.
I first made these after buying a jar of raw wildflower honey I couldn’t stop eating straight from the spoon. I wanted the flavor to last longer. Wrapping it into candy seemed like the obvious answer.
These come together with five pantry ingredients. No candy molds required. Just a heavy pot, a thermometer, and a lined pan.
The honey adds a gentle floral note that makes the finished candy taste more interesting than store-bought caramels. Butter keeps it soft. Salt keeps it honest.
Why You’ll Love This Recipe
- No corn syrup – honey gives real, layered flavor
- Only 5 ingredients, all common pantry items
- Stays chewy for up to two weeks when wrapped
- Makes a generous batch – great for gifting
Ingredient Notes
- honey: Use a raw, mild-flavored honey like clover or wildflower. Strong varieties like buckwheat can overpower the caramel and turn slightly bitter when cooked.
- heavy cream: Full-fat cream (at least 35% fat) is non-negotiable here. Lower-fat cream can cause the caramel to seize or separate.
- granulated sugar: Plain white sugar works best for a clean caramel base. Brown sugar can be swapped for a more molasses-forward candy, but watch for faster burning.
- unsalted butter: Cold butter cut into cubes melts more evenly into the hot caramel. Salted butter works if you reduce the added salt by half.
- fine sea salt: A small amount sharpens all the other flavors. Flaky salt on top of the finished candy is optional but adds a nice visual and textural contrast.
- vanilla extract: Add it off the heat so the alcohol doesn’t flash off before it can do anything. Omit it if you want the honey to stay front and center.
Homemade Honey Caramel Candy
Ingredients
Method
- Line an 8x8 inch baking pan with parchment paper and grease it lightly with butter. Set aside on a heatproof surface.
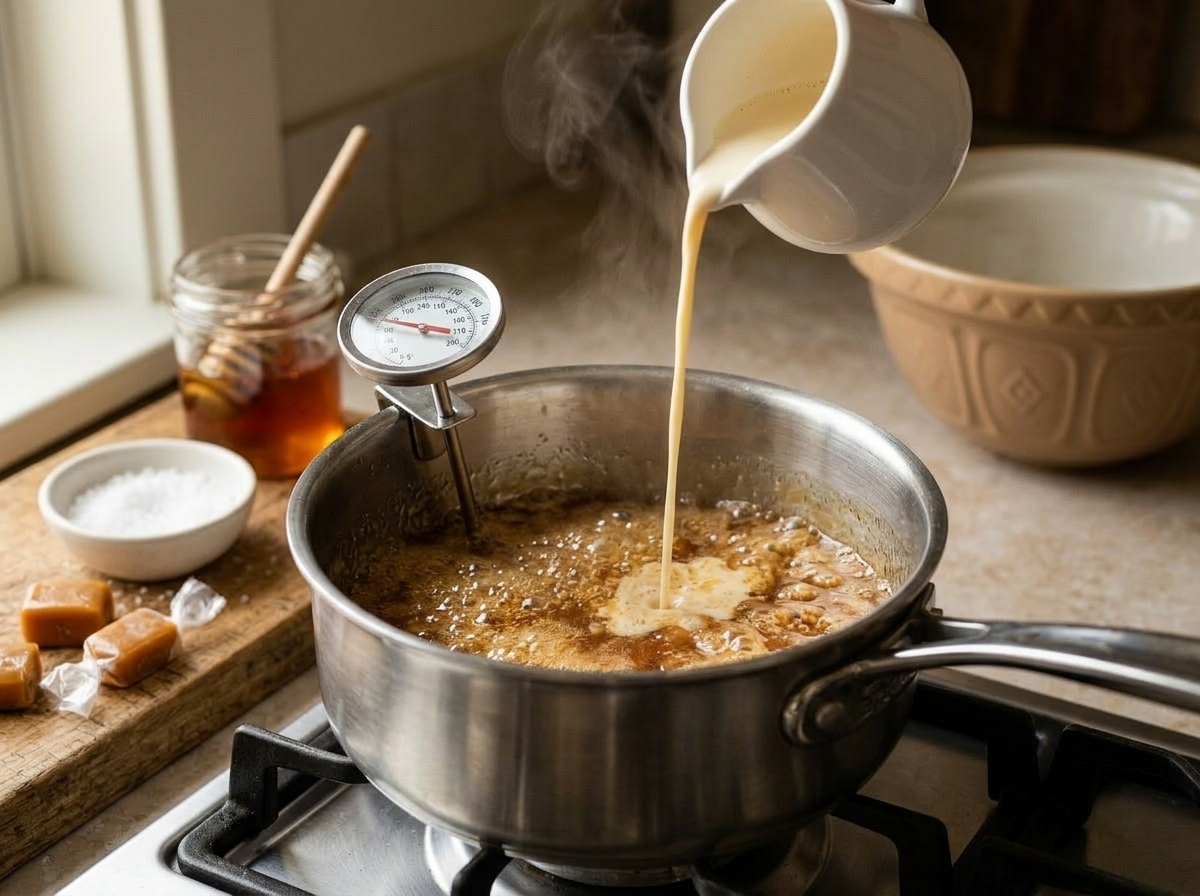
- Warm the heavy cream in a small saucepan over low heat until it just begins to steam. Remove from heat and keep nearby.
- Combine the granulated sugar and honey in a heavy-bottomed 3-quart saucepan. Cook over medium heat, stirring gently with a silicone spatula until the sugar dissolves completely, about 4 to 5 minutes.
- Once the sugar dissolves, stop stirring. Clip your candy thermometer to the side of the pot and increase heat to medium-high. Let the mixture cook undisturbed, swirling the pan occasionally, until it turns a deep amber color.
- Slowly pour the warm cream into the caramel in a thin, steady stream - the mixture will bubble aggressively. Stir constantly with the spatula until smooth.
- Add the cubed butter and salt. Stir until the butter is fully melted and incorporated. Continue cooking over medium heat, stirring frequently, until the thermometer reads 245 F / 118 C, about 8 to 10 minutes.
- Remove the pot from the heat. Stir in the vanilla extract. The mixture will smell deeply of honey and butterscotch.
- Pour the caramel into the prepared pan in one smooth motion. Do not scrape the pot sides, as those bits can crystallize.
- Let the slab cool at room temperature for at least 2 hours, until firm and fully set. Do not refrigerate during this time.
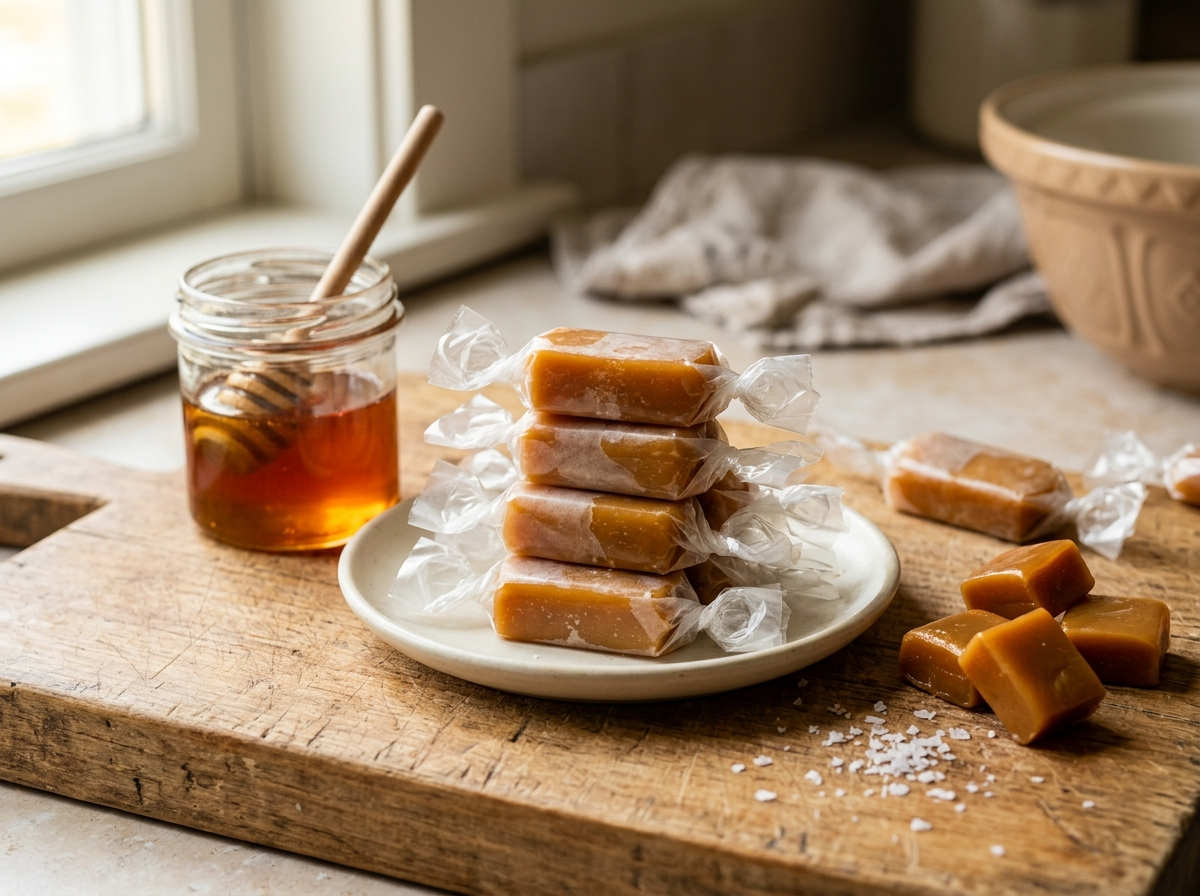
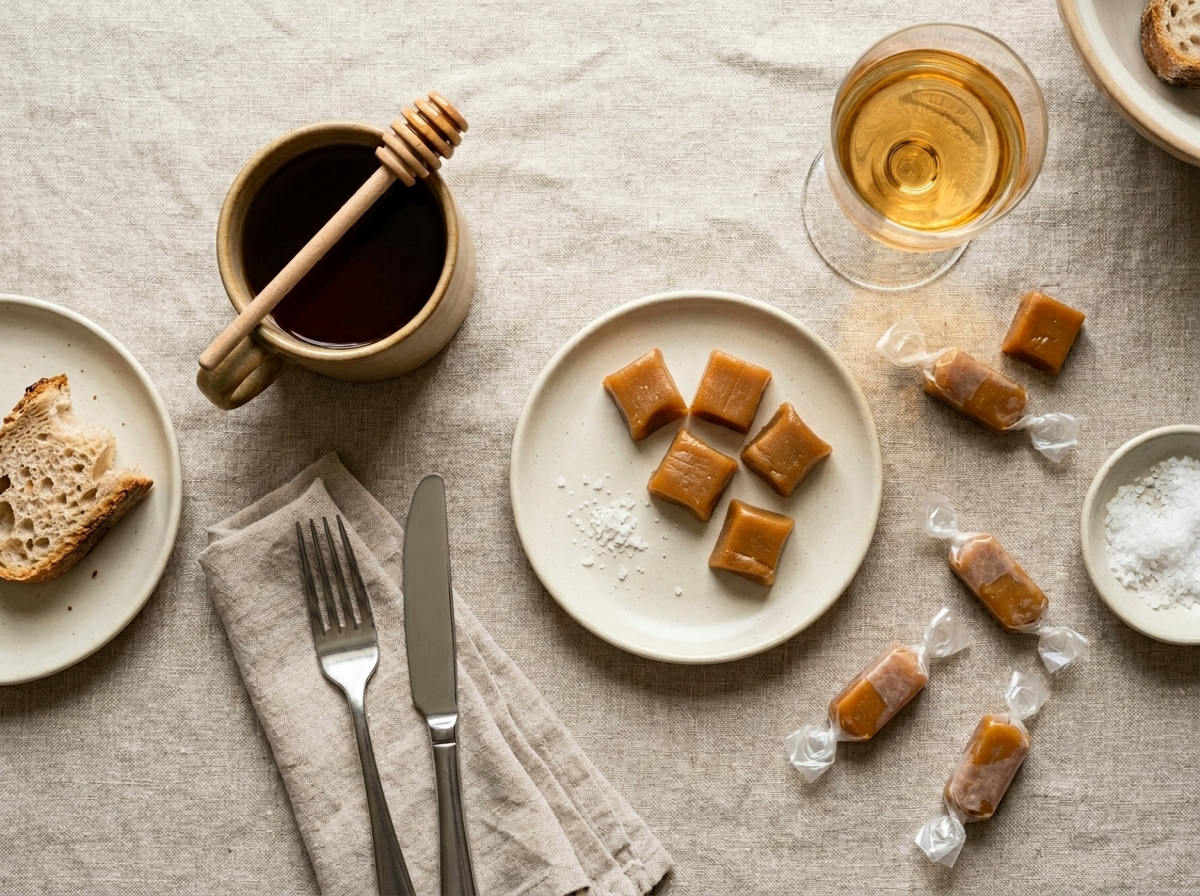
- Lift the slab out using the parchment edges and place on a cutting board. Use a lightly oiled chef's knife to cut into 36 small squares with one firm downward press per cut.
- Wrap each caramel in a small square of wax paper and twist the ends to seal. Store in an airtight tin at room temperature.
Notes
Tips for Success
- Warm your cream in a small saucepan before adding it to the hot caramel to prevent violent splashing and seizing.
- Clip your candy thermometer to the pot so the tip sits in the liquid but doesn’t touch the bottom of the pan.
- Pull the pot at 245 F / 118 C for soft, chewy caramels – every extra degree makes them firmer.
- Line your pan with parchment and grease it lightly with butter so the slab releases cleanly after chilling, the same approach used for honey caramel brittle bars.
- Cut caramels with a lightly oiled chef’s knife using one firm downward press, not a sawing motion, for clean edges.
Variations
- Stir in 1 tsp of flaky sea salt and top the slab with more flakes before it sets for salted honey caramels.
- Add 1/2 tsp of ground cinnamon and a pinch of cardamom with the vanilla for a warm-spiced autumn version.
- Press one whole toasted pecan into the top of each cut piece for a honey-pecan caramel with added crunch.
Storage and Reheating
Wrap each caramel individually in a small square of wax paper or cellophane and twist the ends. This stops them sticking together and keeps them from picking up moisture.
Stored at room temperature in an airtight tin or jar, wrapped caramels keep well for up to 2 weeks. In a cool kitchen, they can stretch to 3 weeks.
Refrigerating them makes caramels harder and sticky – not ideal. If your kitchen runs warm, layer them in a container with parchment between layers and keep the lid tight. Bring back to room temperature before eating.
Serving Suggestions
Arrange a handful on a small plate alongside a cup of black tea or espresso, the way you might serve black sesame honey squares. The honey notes in the caramel echo anything lightly bitter.
They make good gift boxes layered in parchment inside a small tin. Tuck in a few with some no-bake dark chocolate clusters for a homemade holiday gift that looks intentional without much effort.
You can also chop a few pieces and fold them into vanilla ice cream just before it sets completely. They turn into small chewy pockets throughout the scoop.
FAQ
Why did my honey caramel candy turn grainy instead of smooth?
Graininess usually means sugar crystals formed during cooking – often from stirring the pot too much once the sugar has dissolved. Don’t stir after the sugar melts, and make sure your pot and thermometer are clean and dry before you start.
Can I use maple syrup instead of honey in this caramel candy recipe?
You can swap maple syrup 1:1 for the honey, but maple caramelizes faster and at a slightly lower temperature, so watch your thermometer closely. The flavor shifts toward a woodsy, maple-forward candy rather than a floral one.
How do I know when the honey caramel has reached the firm-ball stage without a thermometer?
Drop a small amount of caramel into a glass of cold water. If it forms a firm but pliable ball you can squish between your fingers, it’s ready. A thermometer is more reliable, but this cold-water test works in a pinch.
Can I freeze homemade honey caramel candies?
Yes – wrap each candy individually in wax paper, then place them in a freezer-safe bag. They freeze well for up to 2 months. Thaw at room temperature for 20 to 30 minutes before eating, still in their wrappers so they don’t stick.
Is homemade honey caramel candy gluten-free?
Yes, this recipe contains no flour or gluten-containing ingredients. Just double-check that your vanilla extract is certified gluten-free if you’re cooking for someone with celiac disease, as some brands use grain-based alcohol.
What’s the difference between honey caramel and regular caramel candy?
Regular caramel is made with plain sugar and often corn syrup, which keeps it smooth but neutral in flavor. Honey caramel skips the corn syrup and adds a floral, slightly fruity undertone that changes depending on the type of honey you use.