Every December, I find myself covered in flour, surrounded by the scent of fried dough and fruit jam bubbling on the stove. That’s when I know—Hanukkah’s here.
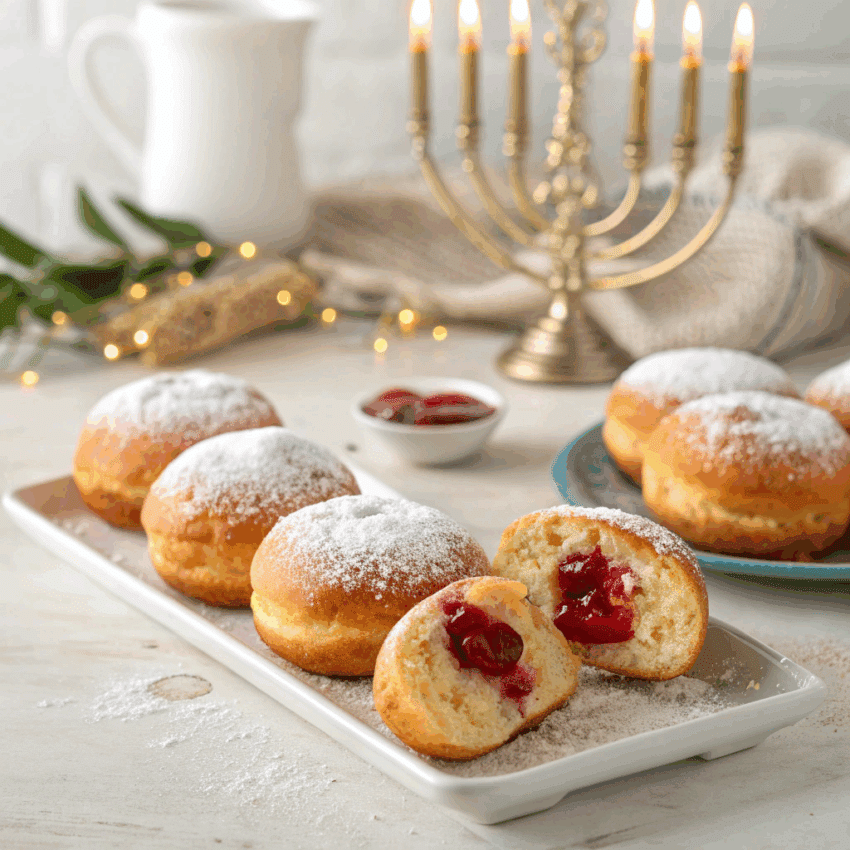
And for me, nothing captures the joy of the holiday quite like sufganiyot—those pillowy, sugar-coated, jelly-filled doughnuts that have been lighting up Jewish tables for generations.
These little rounds of happiness are more than just dessert—they’re part of the celebration. Fried in oil to symbolize the miracle of the Hanukkah lamp, they bring warmth, sweetness, and that irresistible “just one more” feeling to every gathering.
Today, I’m sharing my go-to Hanukkah sufganiyot doughnuts recipe, the one I’ve perfected after years of testing (and, let’s be honest, taste-testing). Whether you’re an experienced baker or new to Jewish desserts, you’ll love how simple—and satisfying—these are.
What Are Sufganiyot?
If you’ve never tried them, think of sufganiyot as the Jewish cousin of the jelly doughnut. Soft yeast dough, deep-fried until golden, then filled with jam or custard and dusted generously with powdered sugar.
Traditionally, sufganiyot are filled with strawberry or raspberry jelly, but I’ve seen families add everything from homemade chocolate spread to apricot jam or even vanilla cream. Whatever you choose, the magic lies in that first bite—warm dough giving way to a sweet, sticky center.
Ingredients You’ll Need
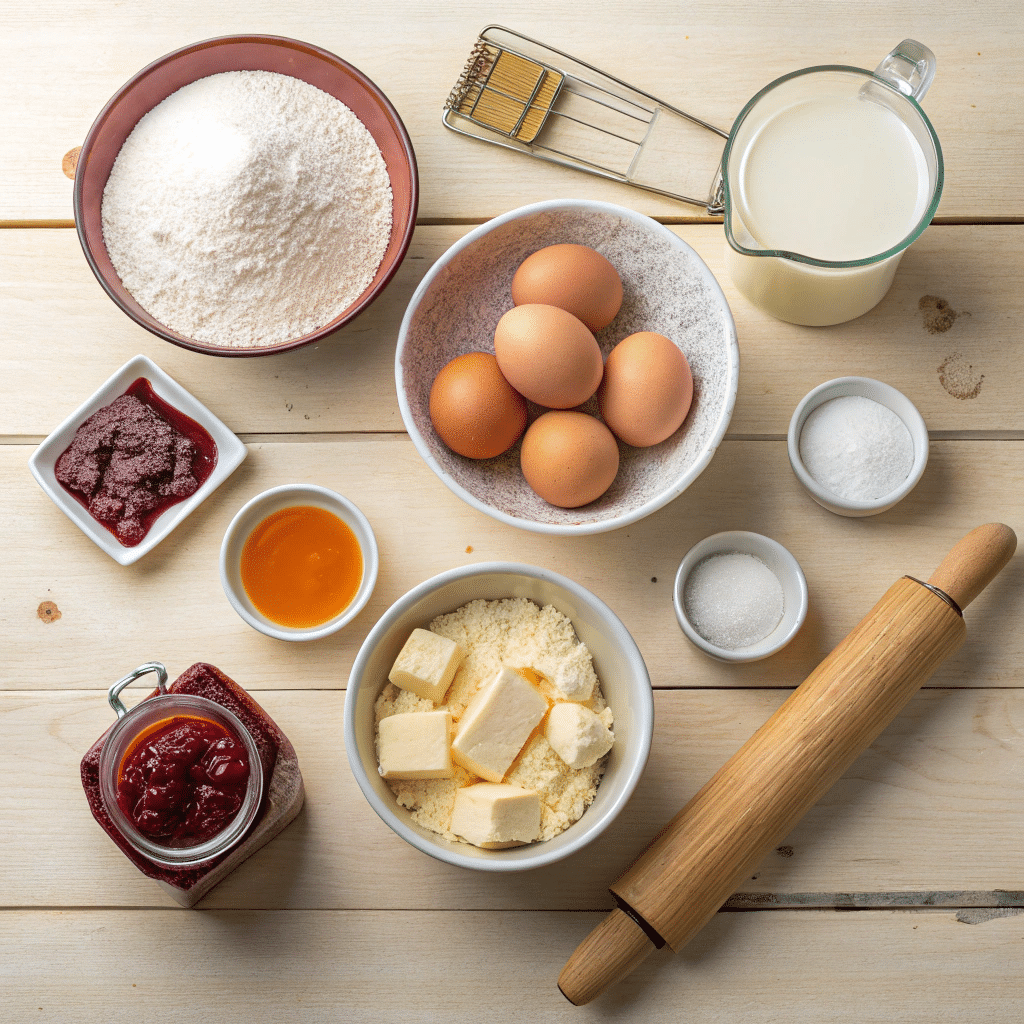
Here’s what goes into the perfect batch of sufganiyot. You probably have most of it in your pantry already.
- 2 ¼ teaspoons (1 packet) active dry yeast
- ¾ cup warm milk (or warm water for a dairy-free version)
- 2 tablespoons sugar
- 3 cups all-purpose flour
- 2 large egg yolks
- 2 tablespoons unsalted butter, softened
- ½ teaspoon salt
- Vegetable oil, for frying
- ½ cup fruit jelly or jam (strawberry, raspberry, or your favorite filling)
- Powdered sugar, for coating
Optional: Chocolate spread or custard if you’re feeling extra indulgent. (And really, who isn’t during Hanukkah?)
Step-by-Step Instructions
1. Wake up the yeast.
In a small bowl, mix warm milk and sugar, then sprinkle the yeast on top. Let it sit for 10 minutes until frothy. If it’s not bubbling, your yeast might need replacing—yeast is a diva about temperature.
2. Make the dough.
In a large bowl, combine flour and salt. Add the frothy yeast mixture, egg yolks, and butter. Mix until a dough forms, then knead for 5–7 minutes until smooth and elastic.
If you’re using a stand mixer, use the dough hook attachment and let it work its magic. The dough should feel soft but not sticky.
3. Let it rise.
Place the dough in a lightly greased bowl, cover with plastic wrap, and let it rise in a warm spot for about an hour—or until doubled in size. (I usually put mine in the oven with just the light on. Works like a charm.)
4. Shape the doughnuts.
Once risen, punch down the dough and roll it out to about ½ inch thick. Use a round cutter (around 2 ½ inches wide) to cut out circles.
Place them on a floured tray, cover loosely with a towel, and let them rest for 30 minutes. You’ll see them puff up again—this is what gives you that soft, fluffy texture.
5. Fry time!
Heat oil in a heavy pot to 350°F (175°C). Carefully drop in 3–4 doughnuts at a time, frying for about 1 minute per side until golden brown. Don’t rush this step—if your oil’s too hot, the outside will brown before the inside cooks.
Use a slotted spoon to transfer the doughnuts onto paper towels to drain.
6. Fill ‘em up.
Once cool enough to handle, use a piping bag fitted with a small tip to fill each doughnut with jelly. I usually poke a small hole in the side and squeeze until I feel the doughnut puff slightly.
7. Sugar shower.
Dust generously with powdered sugar. Don’t hold back—it’s Hanukkah!
Tips for Perfect Sufganiyot
- Fry in small batches. Too many doughnuts lower the oil temperature and lead to greasy results.
- Temperature is everything. Use a thermometer; 350°F is your sweet spot.
- Make them fresh. These are best eaten the same day—they lose their charm if stored overnight.
- Switch up the fillings. Try homemade jelly, chocolate babka spread, or even lemon curd for a twist.
Why Sufganiyot Are a Hanukkah Staple
Hanukkah celebrates the miracle of oil lasting eight days in the Holy Temple. So naturally, oil-fried foods take center stage—latkes, fritters, and yes, doughnuts.
In Israel, bakeries line their windows with every kind of sufganiyah imaginable—glazed, filled, chocolate-topped, or coated in sugar. It’s a delicious reminder of how food keeps tradition alive, one bite at a time.
When I make these at home, I like to imagine I’m continuing that same tradition, just with a little Toronto twist.
Variations to Try
Want to make it your own? Here are a few ways to play with flavor:
- Raspberry & Rosewater: Add a hint of rosewater to your jam for a floral note.
- Chocolate Babka Filling: Use melted chocolate mixed with a spoonful of butter for a rich, glossy center.
- Cinnamon Sugar: Instead of powdered sugar, roll warm doughnuts in cinnamon sugar for an extra crunch.
- Mini Sufganiyot: Use a smaller cutter for bite-sized versions. Perfect for parties or kids’ tables.
Serving Ideas
I like to serve sufganiyot piled high on a platter, dusted with fresh sugar right before bringing them out. Pair them with hot tea or coffee—or if you’re really embracing the holiday spirit, hot cocoa with whipped cream.
If you’re planning a Hanukkah dinner, they make the perfect sweet ending after latkes or brisket. Just make sure to fry enough—these vanish faster than you’d think.
Storage and Reheating
Sufganiyot taste best within a few hours of frying. If you must store them, keep them in an airtight container at room temperature for up to one day. Reheat briefly in the microwave (about 10 seconds) before serving.
Whatever you do, don’t refrigerate—they’ll lose their softness.

Hanukkah Sufganiyot Doughnuts
Ingredients
Method
- Mix warm milk and sugar in a bowl, then sprinkle the yeast on top. Let it sit for 10 minutes until it becomes foamy.
- In a large bowl, combine flour and salt. Add the yeast mixture, egg yolks, and butter. Mix until dough forms, then knead for 5–7 minutes until smooth and stretchy.
- Place dough in a greased bowl, cover, and let it rise in a warm spot for about 1 hour, or until doubled in size.
- Punch down the dough and roll it out to about ½ inch thick. Cut out circles with a 2½-inch cutter. Place on a floured tray, cover with a towel, and let them rise for another 30 minutes.
- Heat oil to 350°F (175°C). Carefully fry a few doughnuts at a time, about 1 minute per side, until golden brown. Drain on paper towels.
- Once slightly cooled, fill a piping bag with jelly. Poke a small hole in each doughnut and pipe in the filling until you feel it puff slightly.
- Dust with powdered sugar generously. Serve warm and enjoy immediately!
Notes
- These are best eaten the same day—they lose their soft texture overnight.
- You can use any jam you love, but seedless raspberry gives that classic look and taste.
- To keep the oil temperature steady, use a cooking thermometer.
- For a dairy-free version, use warm water and vegan butter.
Frequently Asked Questions
Q: Can I make the dough ahead of time?
Yes! Prepare the dough, let it rise once, then refrigerate overnight. Bring it to room temperature before rolling and frying.
Q: What’s the best oil for frying?
Neutral oils like vegetable or canola oil work great. Avoid olive oil—it changes the flavor and burns faster.
Q: Can I bake sufganiyot instead of frying?
You can, but they won’t have the same tender texture or golden crust. If you must, bake at 375°F for about 10 minutes and brush with melted butter before dusting with sugar.
Q: What’s the difference between sufganiyot and regular jelly doughnuts?
Sufganiyot are typically smaller, lighter, and fried specifically for Hanukkah as part of Jewish holiday recipes. But flavor-wise—they’re close cousins!
Q: Any dairy-free tips?
Substitute plant-based milk and vegan butter. The texture stays soft and delicious.
Final Thoughts
Hanukkah sufganiyot doughnuts aren’t just dessert—they’re memory makers. The sizzling oil, the first dusting of sugar, the sticky fingers afterward—it all feels like celebration.
So this year, skip the store-bought ones and try making your own batch at home. You’ll taste the difference, I promise.
And if you end up with a little jam on your shirt? Well, that’s just proof you did it right.