There’s something magical about cookies that invite people to slow down, gather, and create. A cookie decorating station is more than just a table of sugar and sprinkles—it’s the heart of any gathering, where kids get sticky fingers, adults unleash their inner artists, and laughter spills out like powdered sugar on the counter. Whether you’re hosting a Christmas cookie party, a kids’ birthday, or even a casual holiday get-together, this guide will help you set up a station that’s fun, stress-free, and downright delicious.
Why a Cookie Decorating Station Works Every Time
I’ve learned that dessert doesn’t always have to be polished to bring joy. Hand people a blank sugar cookie, a few piping bags, and a spread of toppings, and suddenly, you’ve got entertainment built right into your party. A decorating station is interactive, edible, and adaptable for any occasion.
Planning a kids cookie decorating party? Parents love it because it keeps little ones busy and happy. Throwing a gingerbread party in December? Guests will spend hours competing for the most creative house on the table. Even adults who “don’t bake” suddenly find themselves piping royal icing like pros.
Step 1: Pick Your Cookie Canvas
Every artist needs a canvas. For a DIY cookie decorating station, the cookie itself matters. Here are my favorites:
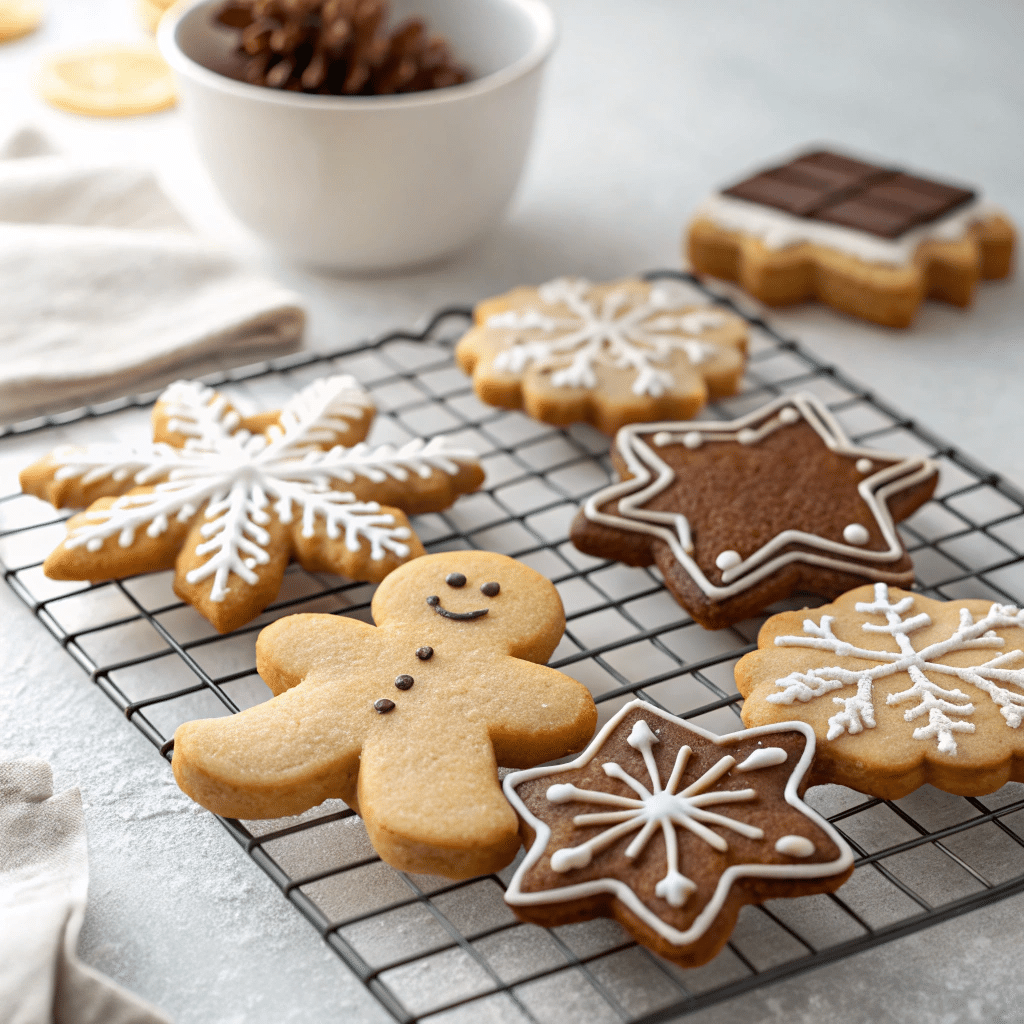
- Classic sugar cookies – flat, sturdy, and ready for frosting.
- Gingerbread men or houses – ideal for a Christmas cookie decorating station.
- Shortbread cookies – melt-in-your-mouth and perfect with minimal toppings.
- Chocolate cut-outs – darker base for white or colorful icing designs.
Tip from my kitchen: bake your cookies a day ahead so they’re cool, firm, and ready to decorate. Nobody wants runny icing on a warm cookie.
Step 2: Frosting That Works Every Time
The frosting makes or breaks a decorate a cookie station. Too runny and it slides everywhere; too stiff and kids give up. I swear by two options:
- Royal Icing – Smooth, glossy, and hardens beautifully. Best for detailed work and stacking.
- Buttercream Frosting – Creamy, flavorful, and forgiving. Great for younger kids who just want to smear and sprinkle.
Set out a few colors in piping bags or small bowls with spatulas. Stick to 3–5 shades—too many options can overwhelm and lead to mud-colored cookies.
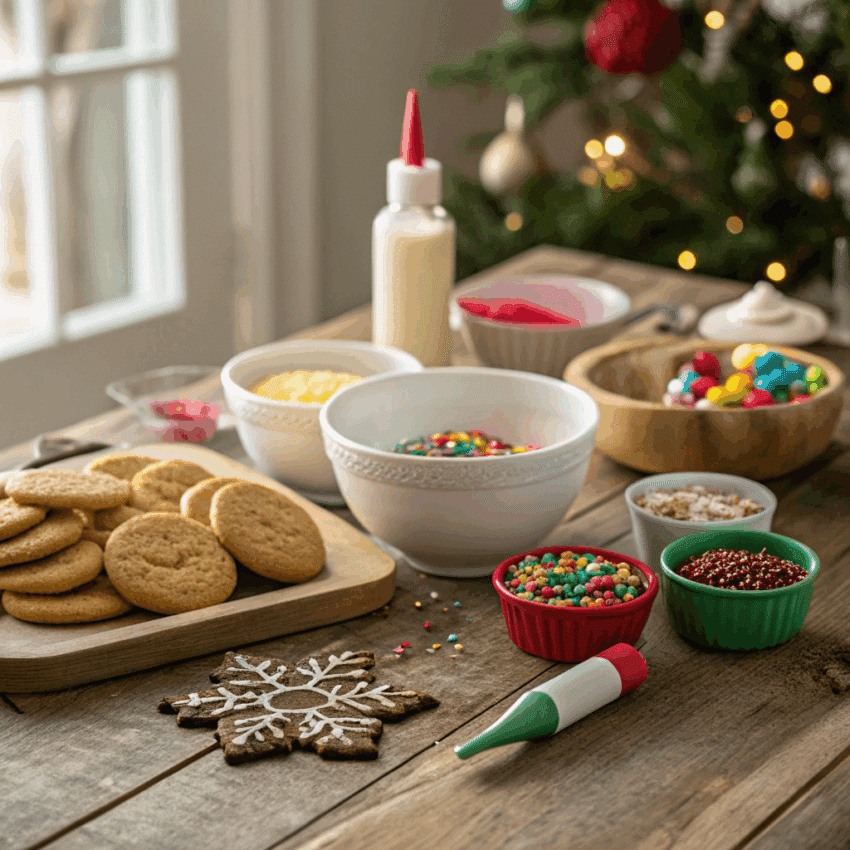
Step 3: All About the Toppings
A cookie decorating station party without toppings is like hot chocolate without marshmallows—still good, but missing the fun.
Here’s a list of crowd-pleasers:
- Sprinkles (holiday shapes, rainbow, metallic stars)
- Mini chocolate chips
- Candy canes, crushed
- M&Ms or other candy-coated chocolates
- Shredded coconut “snow”
- Edible glitter or luster dust
- Marshmallows (tiny ones for snowmen or reindeer)
Pro tip: pour toppings into clear jars or bowls with scoops. It looks festive and avoids sticky little hands diving into bags.
Step 4: Set Up the Station Like a Pro
This is where your creativity shines. The holiday cookie party setup can make or break the flow. I usually think of it like a buffet line: cookies first, then frosting, then toppings.
For kids’ events, keep the station low and reachable. For adults, you can get a little fancy with tiered stands, chalkboard signs, or even a lazy Susan to spin toppings around.
Don’t forget the basics:
- Disposable plates or trays for decorating
- Toothpicks for small details
- Wet wipes or napkins (lots of them)
- A tablecloth or butcher paper you can toss later
If you’re hosting a cookie decorating station for kids, trust me—cover the table. No one wants royal icing glued to their dining table for eternity.
Step 5: Make It Seasonal
Your decorating station doesn’t have to look the same every time. Match it with the theme of your gathering:
- Christmas Cookie Decorating Station: Gingerbread men, snowflakes, candy canes, red and green sprinkles.
- Kids Christmas Party: Cookie trees with green icing and edible ornaments.
- Gingerbread Party: Build mini houses and let guests personalize them.
- Birthday Cookie Decorating Party: Bright colors, confetti sprinkles, and name-initial cookies.
Seasonal tweaks keep the activity exciting and photogenic (hello Pinterest board!).
Step 6: Add Games or Competitions
If you want to crank up the excitement, turn your cookie decorating party into a friendly competition.
Ideas:
- “Most Creative Cookie”
- “Best Holiday Theme”
- “Messiest Cookie” (always a kid favorite)
- “Looks Most Like Grandma’s”
Prizes don’t have to be big. A pack of hot cocoa mix or a holiday mug will do the trick.
Step 7: Keep Cleanup Simple
After running several of these, I can confirm—the decorating is fun, the cleanup… not so much. Plan ahead.
- Use disposable piping bags.
- Hand out individual trays or paper plates.
- Keep trash bins nearby.
- If it’s a kids’ event, have “finished cookie boxes” so families can take goodies home without frosting up their car seats.
Hosting a Cookie Decorating Class Setup
Want to level things up? A cookie decorating class setup is a brilliant way to bring neighbors, coworkers, or even strangers together. Line up cookies at each seat, hand out pre-filled piping bags, and walk the group through a few simple designs. You don’t need to be a pro—you just need confidence and a willingness to laugh at wobbly snowmen.
People love learning new skills, and cookies make it stress-free. Bonus: everyone leaves with edible souvenirs.
My Favorite Recipe for Cookie Stations
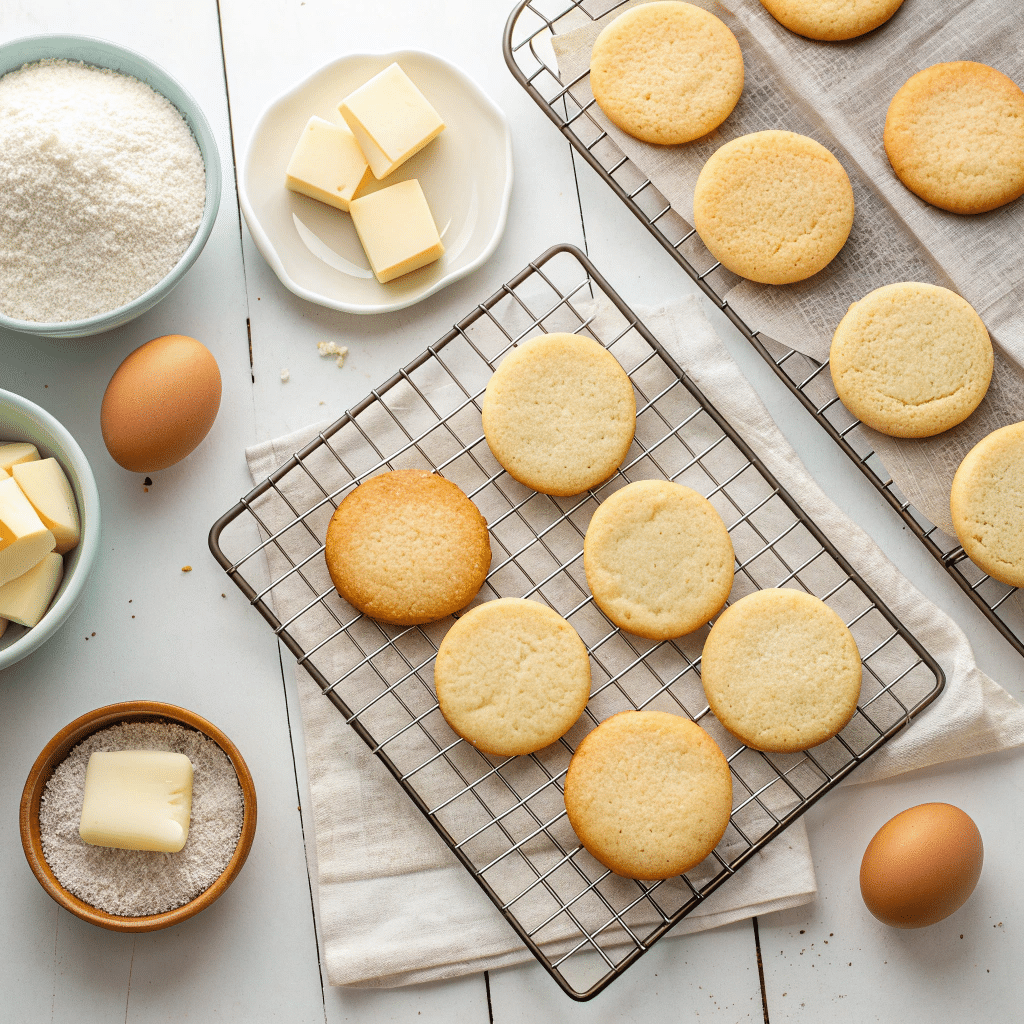
Here’s my go-to sugar cookie recipe. It’s simple, sturdy, and perfect for decorating.
Ingredients:
- 2 ¾ cups all-purpose flour
- 1 tsp baking powder
- ½ tsp salt
- 1 cup unsalted butter, softened
- 1 cup sugar
- 1 large egg
- 1 tsp vanilla extract
Instructions:
- Whisk flour, baking powder, and salt.
- Cream butter and sugar until fluffy.
- Beat in egg and vanilla.
- Mix dry ingredients into wet until dough forms.
- Chill for 30 minutes.
- Roll out, cut shapes, and bake at 350°F (175°C) for 8–10 minutes.
These cookies hold their shape, don’t puff too much, and taste buttery with just the right crunch.
Final Thoughts
A cookie decorating station isn’t about perfection. It’s about sticky fingers, colorful sprinkles, and the joy of creating something sweet together. Whether it’s a kids Christmas party, a gingerbread party, or just a rainy afternoon, the station becomes the centerpiece of laughter and memories.
So grab a tray of cookies, set out the sprinkles, and invite your friends. The only real rule? Eat your masterpiece before someone else does.
FAQs About Cookie Decorating Stations
1. How far in advance can I bake cookies for decorating?
Bake them 2–3 days ahead. Store in airtight containers at room temperature.
2. Can I freeze cookies before decorating?
Yes! Freeze undecorated cookies up to a month. Thaw before setting up your station.
3. What’s the best icing for kids?
Buttercream—it’s forgiving, tastes amazing, and doesn’t harden like glue.
4. How do I prevent icing colors from bleeding?
Keep cookies on parchment until fully dry. Don’t stack them too soon.
5. How do I set up a cookie station for a big crowd?
Make double batches of cookies and frosting. Divide toppings into smaller bowls so guests don’t crowd one spot.